In this article, i want to stay straightforward and just give an example on how to use QEMU to add a simple custom device.
To do so, i choose to emulate a ROM memory mapped on the QEMU RISC-V virtual board.
Introduction
Imagine you are working with a prototype device, and you need to start the development of your Linux device driver, RTOS driver, baremetal application or whatever which require to access this device.
But the board is still not ready yet, or you have one, two boards, and you have a bunch of developers waiting for using this device to validate their features.
You can create a mock that will return pre-defined values to simulate some parts of your device behavior, and i personally like CMocka for that.
But if want to validate the full device behavior, with its IRQs, registers access and a full simulation of the real device, then QEMU is a fantastic tool for that as you can totally emulate a full board.
Getting start with QEMU
Building QEMU for your Board Architecture
The first step, will be to get the QEMU source and build it for your Board Architecture.
I choose the RISC-V 64 ISA as i’m discovering RISC-V right now, but it doesn’t matter in the end as the device we want to emulate is simple enough to work on any architectures.
At the date of this post, QEMU v6.0.0 is the most recent revision.
$ git clone https://github.com/qemu/qemu.git
$ git checkout v6.0.0
$ cd qemu
$ ./configure --target-list=riscv64-softmmu
$ make
After the make completion, you should have your built QEMU in the build/ folder.
Testing your host OS in QEMU – The Buildroot and Linux case
Here it obviously depends on your OS, in my case i’m using a Linux kernel with a minimal rootfs built using Buildroot.
To reproduce my setup you can either use directly the qemu_riscv64_virt_defconfig from Buildroot:
$ git clone https://github.com/buildroot/buildroot.git
$ cd buildroot/
$ make qemu_riscv64_virt_defconfig
$ make
Or use my out-of-tree Buildroot Kernel Labs, which just add debug symbols and facilities like GDB scripts, and built an Hello World Linux module.
This step is absolutely not necessary here, as hopefully this example will work without having to use GDB (promise :D).
But if you want to use my Kernel Labs for testing purpose:
$ git clone https://github.com/buildroot/buildroot
$ git clone https://github.com/sbourdelin/br2-external-kernel-dev-lab
$ cd buildroot/
$ make BR2_EXTERNAL=../br2-external-kernel-dev-lab
$ make qemu_riscv64_virt_debug_defconfig
$ make
In any case, after the make completion, you should have your kernel and rootfs ready in the output/images/ sub-folder:
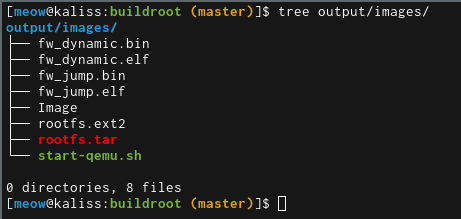
Note that you have a start-qemu.sh script ready to be used (yes Buildroot is great!).
However, we need to modify this script to use our own built QEMU.
We can keep all the arguments and just point to our built qemu-system-riscv64 binary:
$ exec <path_to_your_qemu>/build/qemu-system-riscv64 -M virt -bios fw_jump.elf -kernel Image -append "rootwait root=/dev/vda ro" -drive file=rootfs.ext2,format=raw,id=hd0 -device virtio-blk-device,drive=hd0 -netdev user,id=net0 -device virtio-net-device,netdev=net0 -nographic
Which should boot the Kernel with our minimal Rootfs and give you the Buildroot prompt:
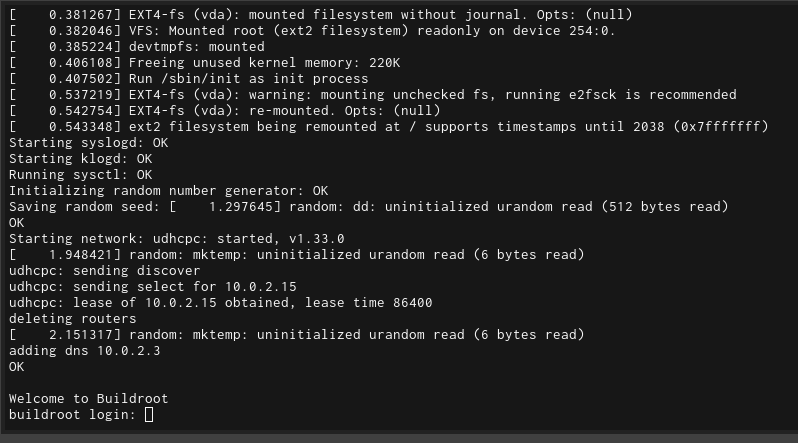
(the default login is root).
Writing a custom device in QEMU
The Banana ROM
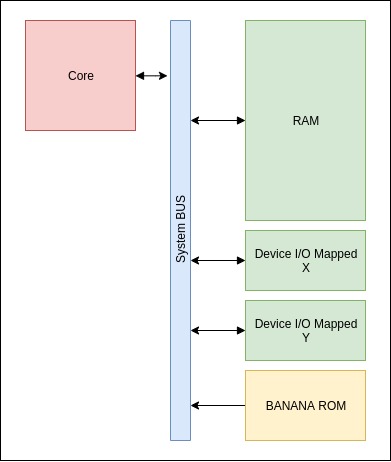
The new device we want to add is a simple ROM, which i called the banana_rom (it’s actually a bad name as it exists the banana_board and there is absolutely no link with my virtual rom).
Below an overview of our block diagram:
The QEMU Object Model (QOM)
In QEMU, all devices are represented as an object using the QEMU Object Model.
« The QEMU Object Model provides a framework for registering user creatable types and instantiating objects from those types. »
As described in the API
This Model follow the Object Oriented Programming approach where a device is an object inheriting from a parent object.
In our case, and from the QEMU Object Model point of view, our banana_rom is a child object from the system bus.
Registering a new Device
The first step is to filled the TypeInfo structure, which will be used to register the device (in our case as a static type, there is multiple types available in the QEMU API), and initialize it:
/* create a new type to define the info related to our device */
static const TypeInfo banana_rom_info = {
	.name = TYPE_BANANA_ROM,
	.parent = TYPE_SYS_BUS_DEVICE,
	.instance_size = sizeof(BananaRomState),
	.instance_init = banana_rom_instance_init,
};

static void banana_rom_register_types(void)
{
    type_register_static(&banana_rom_info);
}

type_init(banana_rom_register_types)
We inherit from the system bus, and fill the instance_size and instance_init callback with respectively the state of our device, and a function to instance it.
Device State
The device state structure is used to keep track of the status of the device in our board.
I tend to see it as an equivalent to the kobject in Linux with kset file operations associated, but it’s my interpretation which might not be correct at all.
struct BananaRomState {
	SysBusDevice parent_obj;
	MemoryRegion iomem;
	uint64_t chip_id;
};
Here i’m defining a MemoryRegion associated to the device state, which will be our memory mapped space and a chip_id.
For a more complex device we could imagine having specific registers and irqs defined here.
Instance Initialization
#define CHIP_ID	0xBA000001

static void banana_rom_instance_init(Object *obj)
{
	BananaRomState *s = BANANA_ROM(obj);

	/* allocate memory map region */
	memory_region_init_io(&s->iomem, obj, &banana_rom_ops, s, TYPE_BANANA_ROM, 0x100);
	sysbus_init_mmio(SYS_BUS_DEVICE(obj), &s->iomem);

	s->chip_id = CHIP_ID;
}
There is a bit of magical macro but the idea here is to initialize our device state by allocating its memory, the file operations associated to it and its size using the memory_region_init_io function.
The size of the memory we are allocating 0x100 is not random, i’ll explain it later when we will add our device to our board.
Then we let the system bus know that this memory region is handle by our device by using the sysbus_init_mmio function.
Finally we add others required initialization like the CHIP_ID in my case.
Device file operations
As our ROM is Read-Only by definition, the file operations associated to the device are minimalist.
static const MemoryRegionOps banana_rom_ops = {
	.read = banana_rom_read,
	.endianness = DEVICE_NATIVE_ENDIAN,
};
We just need to define a read callback and the endianness associated to the MemoryRegion.
The read callback is as simple as:
#define REG_ID 	0x0

static uint64_t banana_rom_read(void *opaque, hwaddr addr, unsigned int size)
{
	BananaRomState *s = opaque;

	switch (addr) {
	case REG_ID:
		return s->chip_id;
		break;

	default:
		return 0xDEADBEEF;
		break;
	}

	return 0;
}
The first bytes return the chip_id and the rest of the ROM is filled with 0xDEADBEEF.
Exporting the Device
Finally as i don’t want to have my device tied to a specific board and i’m not planning to use the Device Tree.
I’m just providing a function to create my new device which can be called from the board initialisation.
DeviceState *banana_rom_create(hwaddr addr)
{
	DeviceState *dev = qdev_new(TYPE_BANANA_ROM);
	sysbus_realize_and_unref(SYS_BUS_DEVICE(dev), &error_fatal);
	sysbus_mmio_map(SYS_BUS_DEVICE(dev), 0, addr);
	return dev;
}
And we are done for the device, now we just need to add it to an existing board which in our case is the RISC-V virtual board.
Adding the Banana ROM to the QEMU RISC-V virtual board
As i choose to target the QEMU RISC-V virtual board (remember the qemu_riscv64_virt_defconfig from Buildroot), we will need to add our device to this board in QEMU.
Kconfig and Meson in QEMU
QEMU uses Kconfig and Meson to select and built the dependencies.
First, we add the BANANA_ROM config dependencies in the RISCV_VIRT config:
[qemu/hw/riscv/Kconfig]

@@ -34,6 +34,7 @@ config RISCV_VIRT
    select SIFIVE_TEST
    select VIRTIO_MMIO
    select FW_CFG_DMA
+   select BANANA_ROM

config SIFIVE_E
    bool
And we let Meson know what to build when this symbol is selected:
[hw/misc/meson.build]

@@ -1,4 +1,5 @@
  softmmu_ss.add(when: 'CONFIG_APPLESMC', if_true: files('applesmc.c'))
+ softmmu_ss.add(when: 'CONFIG_BANANA_ROM', if_true: files('banana_rom.c'))
  softmmu_ss.add(when: 'CONFIG_EDU', if_true: files('edu.c'))
  softmmu_ss.add(when: 'CONFIG_FW_CFG_DMA', if_true: files('vmcoreinfo.c'))
  softmmu_ss.add(when: 'CONFIG_ISA_DEBUG', if_true: files('debugexit.c'))
Adding a device in the QEMU RISC-V virtual board Memory Map
As our device is io/mapped, we need to find some space in our board memory map that can be assigned to it.
Remember the 0x100 space allocated during the Instance Initialization, below this is why:
[hw/riscv/virt.c]

@@ -51,6 +52,7 @@ static const MemMapEntry virt_memmap[] = {
    [VIRT_RTC] =         {   0x101000,        0x1000 },
    [VIRT_CLINT] =       {  0x2000000,       0x10000 },
    [VIRT_PCIE_PIO] =    {  0x3000000,       0x10000 },
+   [VIRT_BANANA_ROM] =  {  0x4000000,       0x100 },
    [VIRT_PLIC] =        {  0xc000000, VIRT_PLIC_SIZE(VIRT_CPUS_MAX * 2) },
    [VIRT_UART0] =       { 0x10000000,         0x100 },
    [VIRT_VIRTIO] =      { 0x10001000,        0x1000 },
Create our device during the board init
Finally, the last think to do is to create the banana_rom device during the RISC-V board init:
@@ -731,6 +733,9 @@ static void virt_machine_init(MachineState *machine)
    /* SiFive Test MMIO device */
    sifive_test_create(memmap[VIRT_TEST].base);

+   /* Banana device */
+   banana_rom_create(memmap[VIRT_BANANA_ROM].base);
+
    /* VirtIO MMIO devices */
    for (i = 0; i < VIRTIO_COUNT; i++) {
        sysbus_create_simple("virtio-mmio",
And that’s it!
Testing our new QEMU device in Linux
Let’s boot our previously built Linux in our new QEMU.
$ exec <path_to_your_qemu>/build/qemu-system-riscv64 -M virt -bios fw_jump.elf -kernel Image -append "rootwait root=/dev/vda ro" -drive file=rootfs.ext2,format=raw,id=hd0 -device virtio-blk-device,drive=hd0 -netdev user,id=net0 -device virtio-net-device,netdev=net0 -nographic
Then we should be able to access the ROM by reading at the address 0x4000000 using /dev/mem

Woot Woot!
Hope you had fun 🙂
Code Source
The source from this example can be found on my github.